Introduction
Installing a float switch correctly is essential for ensuring reliable liquid level control in tanks, reservoirs, and pumping systems. A poorly installed float switch can cause pump failure, dry running, or overflow – leading to costly downtime and potential environmental risks.
In this guide, we explain step-by-step how to install a float switch, common mistakes to avoid, and tips to maximise the service life of your equipment.
Tools and Materials You’ll Need
Before starting, prepare the following:
- Float switch unit (e.g. Flygt ENM-10 liquid level regulator)
- Pump or control panel connection
- Mounting accessories (cable holder or weight)
- Electrical tools (screwdriver, pliers, insulation tape)
- Personal protective equipment (gloves, safety glasses)
Step-by-Step Float Switch Installation
Step 1: Plan the Installation
- Identify the application – water tank, sump, sewage pit, or industrial reservoir.
- Determine the start and stop levels for your pump.
- If multiple pumps are used, you may need more than one float switch (e.g. one for stop, one for start, and another for high-level alarm).
Step 2: Position the Float Switch
- Lower the float switch into the liquid chamber.
- Ensure the switch hangs freely without touching the walls, pump, or pipework.
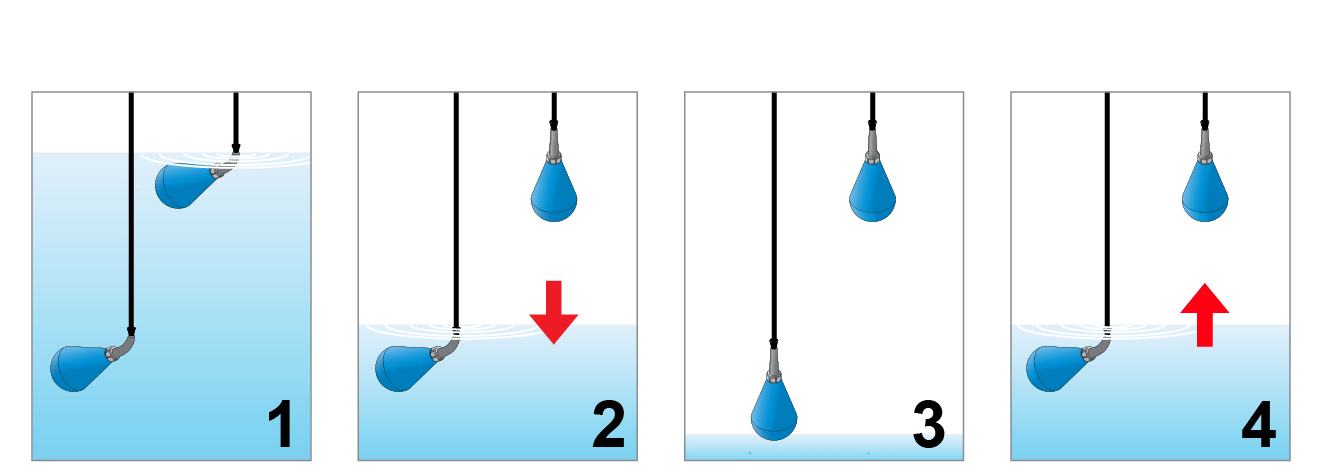
- The Flygt ENM-10 is designed to hang immersed in liquid, preventing cable tangling and build-up of debris.
Step 3: Secure the Cable
- Use a cable holder or weight to keep the float switch at the correct depth.
- Ensure there is enough slack for the float to tilt freely as liquid levels change.
- Avoid sharp bends or tension on the cable to prevent premature wear.
Step 4: Electrical Connection
- Connect the float switch cable to the pump control panel or alarm system.
- Follow the wiring diagram provided by the manufacturer.
- Typically, the microswitch can be configured as normally open (NO) or normally closed (NC), depending on whether the pump needs to start when liquid rises or falls.
- Ensure all electrical work complies with local regulations and safety standards.
Step 5: Test the Operation
- Fill the tank or sump with water to the desired start level.
- Check if the float switch tilts and activates the pump.
- Allow the pump to run until the stop level is reached, confirming that the float switch resets correctly.
- Repeat the cycle to ensure reliable performance.
Common Installation Mistakes to Avoid
❌ Installing the float switch too close to the wall, where movement is restricted.
❌ Leaving the cable unsecured, which may cause tangling.
❌ Incorrect wiring, leading to pump running dry or failing to stop.
❌ Ignoring manufacturer recommendations for cable length or liquid density.
Maintenance Tips for Longer Service Life
- Inspect the cable and switch for signs of wear during routine pump maintenance.
- Clean the float switch if used in wastewater or sludge applications to prevent debris build-up.
- Replace worn cable holders or weights to maintain proper alignment.
- Always test the switch function after maintenance or pump servicing.
Conclusion
A properly installed float switch ensures your pumping system runs efficiently, protects equipment from damage, and prevents costly downtime. The Flygt ENM-10 float switch, supplied by Winston Engineering, offers long-lasting performance in wastewater, groundwater, and industrial applications.
📩 For professional advice or supply of float switches in Singapore, contact us at [email protected] or visit winstonengineering.com.


